Build Your Backrooms Maze Design Checklist
Copy this checklist every time you publish—catch density, visitor flow, and offline-ready layout in one pass.
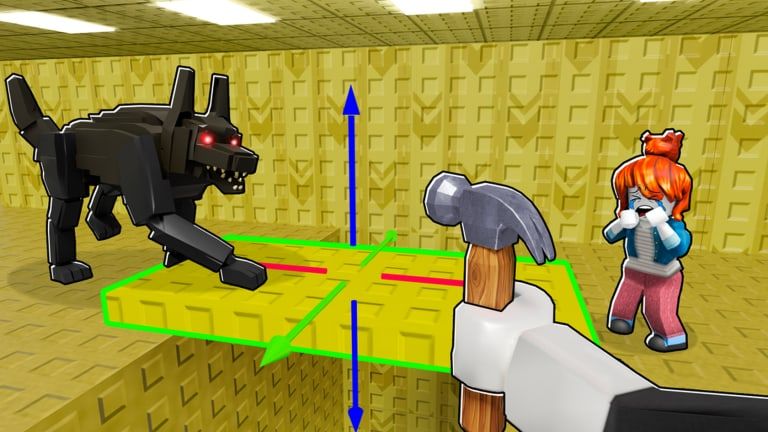
Use this Maze Design Checklist before you call a layout finished in Build Your Backrooms on Roblox. Wind Sun Moon [WSM] rewards mazes that catch visitors—including offline—so publishing without QA wastes monster slots and building cash. Treat unchecked boxes as bugs waiting to happen.
Pair with Buildings Tier List, Monsters Tier List, and Cash Progress Tips. Return to the Tools Hub for other planners.
Phase 1 — Concept and scope
- Define maze goal — Income farm, horror showcase, or hybrid; write one sentence at top of your notes.
- Pick target route time — 90–180 seconds for income loops; longer only if traffic justifies it.
- Count owned building modules — Open Buildings Index and list what you can place today.
- Count owned monsters — Match roles from Monsters Index.
- Set visitor capacity mindset — Servers max six players; design forks that stay interesting with 1–6 explorers.
Phase 2 — Spine layout
- Place entrance-to-first-junction path — No optional skips before first decision point.
- Chain standard hallway modules — Prefer S-tier segments from Buildings Tier List.
- Insert offset corners — Break sightlines every 3–5 straight modules.
- Add first T-junction — At least one wrong-turn bait branch by module six.
- Verify no entrance escape — Walk backward; fix tiles that let visitors leave without catches.
- Mark main loop vs optional wings — Color-code in editor notes if supported.
Phase 3 — Junctions and compression
- Four-way or second T-junction — Decision density ≥ one fork per 8–12 hallway modules.
- Dead-end stub halls — At least one bait wing with visible but risky reward cue.
- Loop connector installed — Main route returns without resetting at entrance.
- Narrow squeeze segment — At least one single-file choke on income builds.
- Limit wide gallery spans early — Showcase wings optional until core loop earns.
- Measure compression — Count walkable tiles vs monster trigger zones; aim for overlap.
Phase 4 — Monster placement
- One role per choke — Corridor stalker on straights, lurker on forks (see Monsters Tier List).
- Mid-hall stalkers — Not on entrance tile.
- Junction lurker off obvious path — Bait branch or blind corner.
- Dead-end guard in trap wing — Matches stub hall from Phase 3.
- Offline anchor at hub — If unlocked, placed at highest traffic junction.
- Remove duplicate roles — Two patrollers in one small room often waste slots.
- Budget filler audit — Replace F-tier legacy hunters when cash allows.
Phase 5 — Solo walkthrough
- Walk main loop at normal speed — Time the route; compare to Phase 1 target.
- Walk bait branch — Confirm dead-end guard or lurker triggers.
- Sprint test — Ensure quick tag hunters still connect on narrow segments.
- Re-entry test — Loop connector forces another pass without exploit skip.
- Note blind spots — Tiles where catches never fired; adjust monsters or walls.
- Screenshot map overview — For comparing before/after patches.
Phase 6 — Multiplayer test (up to 6 players)
- Split at first junction — Two players take different branches simultaneously.
- Bait volunteer — One player intentionally takes trap wing.
- Sprint vs walk pair — Tests noise or speed-based hunters if placed.
- Fresh visitor perspective — Someone who never saw draft layout joins cold.
- Catch count log — Ten-minute session; catches per visitor should exceed solo baseline.
- Frustration check — If everyone quits before loop ends, shorten route or reduce cheap catches.
Phase 7 — Offline readiness
- Confirm monsters placed server-side — Not just client preview.
- Publish maze visibility — Private mazes earn zero offline traffic.
- Share link or discovery-friendly title — Offline income needs visitors.
- Hub monster present — Offline anchor or equivalent at traffic center.
- Loop completable AFK — NPC or idle visitors must finish path without chat help.
- Set reminder to check earnings — Daily login validates offline tick.
Phase 8 — Polish and publish
- Lighting pass — Readable without breaking horror tone.
- Remove builder-only blocks — No dev clutter visible to visitors.
- Signage minimal — Subtle cues only; overt arrows reduce wrong-turn catches.
- Thumbnail screenshot — Shows hallway identity; update social posts.
- Cross-link mentally to tier lists — Any C-tier wing justified by showcase goal?
- Run Cash Progress Tips — Next unlock supports this layout shape.
Phase 9 — Post-publish monitoring
- Day-one catch review — Compare to pre-publish co-op log.
- Watch Updates Hub — Patches may break pathing or monster AI.
- Visitor feedback — Friends report junction confusion or unfair dead-ends.
- Iterate one variable — Change junction bait side, not entire maze, per patch cycle.
- Re-run checklist — After any monster swap or building module upgrade.
Quick reference — common failures
| Symptom | Likely cause | Fix |
|---|---|---|
| Low catches, long maze | Too many wide rooms | Add narrow segments; see Buildings Index |
| Visitors quit early | Route too long or unfair | Shorten loop; move guards off main spine |
| Offline income flat | No external traffic | Share maze; improve thumbnail and title |
| S-tier monster weak | Role mismatch | Move stalker to straight hall, lurker to fork |
| Co-op boring | Parallel identical paths | Add asymmetric bait branches |
Example session log (template)
Date: ____
Maze version: ____
Route time (solo): ____ sec
Co-op catches / 10 min: ____
Offline earnings next day: ____
Changes next: ____
Copy the template into your notes app each publish cycle.
Related pages
- Cash Progress Tips — Spend order after layout validates
- Buildings Index — Module names and roles
- Monsters Index — Hunter roles and offline notes
- Getting Started — First maze tutorial
- Catalog Hub — Collection overview
This checklist replaces risky automation promised by unverified scripts—see Scripts Hub for account safety context.
Frequently Asked Questions
Quick answers for maze builders and explorers.
How often should I run this checklist?
Run the full checklist before every public publish and after major patches listed on the Updates Hub. Minor monster swaps need at least Phases 4 and 5.
Can I skip multiplayer testing?
Solo testing catches many issues, but split-path behavior at junctions often needs two or more players. Recruit at least one friend when possible.
What route time is best for offline income?
Most income mazes target 90–180 seconds per loop so visitors complete runs while you are away without quitting from length.
Does checklist order matter?
Phases 1–4 are sequential—layout before monsters. Phases 5–9 can repeat iteratively until catches and offline earnings meet your goal.
Where do building and monster tiers fit in?
Use tier lists during Phases 2–4 to pick modules and hunters. The checklist verifies you placed them correctly, not which ones you own.