Build Your Backrooms Best Funnel Layout for Cash
Force every Visitor into your strongest monster inside your highest-multiplier room—then scale slots without sprawl.
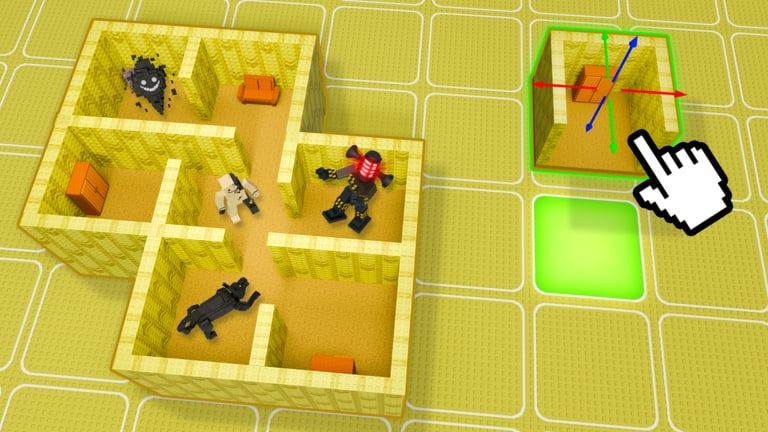
The fastest earners in Build Your Backrooms do not win with the biggest yellow maze. They win with a funnel: one forced path from Visitor spawn into a high-multiplier room that holds your strongest monster, then optional layout tricks that raise monster capacity. Wind Sun Moon [WSM]‘s loop rewards capture location and density, not wallpaper sprawl. This guide turns that meta into a buildable blueprint you can retest after every rebirth.
Pair this page with How to Build a Maze, How to Catch Players, How to Earn Cash, and the Rebirth Guide. With the game past nineteen million visits, explore traffic is denser—funnels convert that traffic better than decorative labyrinths.
Why funnels beat sprawling mazes
Every Visitor who wanders into a cheap corridor leaks income. Captures inside Red Pool, Entity Nest, Mirror Hall, or other top multiplier plots pay far more than the same monster on a Yellow Corridor. A funnel:
- Removes side choices that dilute traffic.
- Puts the best monster next to spawn so captures happen immediately.
- Keeps building count high for rebirth quotas without wasting cash on dead wings.
Beginners often spread Smiler, Crawler, and Hotel Keeper across the whole map. Endgame players park Red Watcher (or their best unlock) in Red Pool at the entrance and feed every NPC into that room.
Core funnel blueprint (all rebirth tiers)
Step 1 — Lock a single path from spawn
- Place an L-shaped or narrow corridor so Visitors cannot see a straight exit.
- Avoid four-way hubs near spawn until your main payout room is online.
- Keep every new room connected to the entrance path—orphaned wings earn zero.
Step 2 — Drop the highest-multiplier room as early as possible
| Phase | Target rooms |
|---|---|
| Early | Yellow Crossroad + Office Room (temporary) |
| Mid | Steam Room, Shallow Pool, Hotel Corridor, Old Lobby |
| Mid–late | Neon Corridor, Arcade Turn, Mirror Hall |
| Endgame | Dark Corridor, Fake Exit, Entity Nest, Red Pool |
Buy rare restocks the moment they appear—shop rotation can remove high-tier pieces.
Step 3 — Place your best monster inside that room, against spawn
Distance kills payout. The meta placement is inside the multiplier room, as close to Visitor spawn as the editor allows. One strong hunter beats three mid-tier hunters scattered deep in the maze. See Monsters Tier List for role picks and Game Passes if you buy Double Cash Pass later.
Step 4 — Use cheap pieces only for rebirth quotas
Fill building-count requirements with Yellow Crossroads in a side grid, then delete or repurpose filler after rebirth. Do not clog the funnel with Alarm Corridor / Electrical Room cosmetics that do not raise capture value. Details: Rebirth Guide.
Zigzag one-way path and monster slots
Base monster capacity rises with buildings and rebirth tier. Community layouts also report a zigzag one-way path that can unlock extra slots—some players push from four monsters to six:
- Build expensive straight rooms tied into a forced one-way zigzag.
- Connect that path so the game grants additional monster slots.
- Block the exit with a closed room (often Electrical Room or similar) so Visitors loop and get caught repeatedly.
Treat this as a layout experiment, not a guaranteed patch-proof exploit. Retest after every Updates Hub refresh. Never confuse a slot trick with rebirth unlocks—you still need Red Pool / Red Watcher for endgame payouts.
Optional Robux +3 monster slots is documented on Game Passes if you prefer a paid capacity bump.
Funnel checklist before you publish
- Spawn forces a turn within the first few tiles
- Highest-multiplier owned room sits on the main spine near spawn
- Strongest monster is inside that room (not in a side gallery)
- No disconnected buildings
- Exit exists but is blocked or hidden after the catch loop
- Yellow Crossroads filler is off the income spine
- Overnight offline tick still fires—see Offline Earnings
- Friend test in a six-player server (Multiplayer and Friends)
Common funnel failures
| Mistake | Result | Fix |
|---|---|---|
| Wide plaza at spawn | Visitors spread; low captures | Narrow L-corridor into one room |
| Best monster deep in maze | Low multiplier captures first | Move hunter to entrance multiplier room |
| Decorative dead ends on main path | Traffic waste | Relocate bait behind the payout room |
| Rebirth filler on spine | Confusion + lower $/visit | Side-grid Crossroads only |
| Open exit before catch loop | Escapes | Closed-room block after zigzag |
Scaling after each rebirth
When you unlock Mirror Hall, Entity Nest, or Red Pool, rebuild the funnel tip first—do not expand width. Swap the old tip room out, redeploy the new best monster, then reclaim the free group monster scaled to your rebirth (Links Hub → WSM group). Re-check Buildings Tier List before spending on galleries.
Related pages
- How to Build a Maze — Broader layout theory
- How to Catch Players — Placement roles
- Rebirth Guide — Unlock tables for tip rooms
- Game Passes — Double Cash Pass and slot purchases
- Cash Progress Tips — Spend order between rebuilds
- 19M Visits Milestone — Current traffic context
Frequently Asked Questions
Quick answers for maze builders and explorers.
What is the best funnel layout in Build Your Backrooms?
Force one path from spawn into your highest-multiplier room (ideally Red Pool or Mirror Hall), place your strongest monster inside that room next to spawn, and avoid scattering hunters across decorative wings.
How do I get six monster slots instead of four?
Community layouts use a zigzag one-way path tied to expensive rooms, then block the exit so Visitors loop. Results can vary after patches—retest live. Paid +3 slots are covered on the Game Passes page.
Should I build a huge maze for more cash?
No. Sprawl usually lowers capture value. A short funnel into a high-multiplier room outperforms a large maze full of cheap corridors.
Where should Fake Exit and Entity Nest sit?
On the main funnel spine after you unlock them—not as isolated showcase rooms. Fake Exit works as bait; Entity Nest belongs near your best hunter.
Does the funnel still work offline?
Yes. Offline catches still need a published path with monsters placed. A tight funnel improves overnight ticks when explore traffic hits your plot.